Dr.Fone - iOS System Recovery
Fix with various iOS system issues like recovery mode, white Apple logo, black screen, looping on start, etc.
Texting iMessages is pretty easy via iOS 9 iPhone, iPad, iPod touch, and Mac. However, accidentally deleting iMessage also happens all the time. Is it also so pretty to recover deleted iMessages? The answer is YES. There are three ways for you to retrieve deleted iMessages from iPhone, iPad and iPod touch.
Provides you with three ways to recover deleted iMessages from iPhone 6s(Plus)/6 (Plus)/5S/5C/5/4S/4/3GS
After downloading and installing the program (Dr.Fone - iPhone Data Recovery), run it on your computer. Then the program's window will be as follows. You can simply click "Start" to scan it.

Just as the last step in the recovery mode above. It's the time to preview and check your previous data now. Just check one by one and click Recover to save them on your computer.
Note: Learn more about recover deleted messages from an iPhone (iOS 9 supported), you can go there: Recover deleted iPhone messages
As we all know that iTunes can automatically backup the data on an iPhone, iPad or iPod touch, when you sync with it. After losing data, you can directly restore the backup to your iPhone. Referring to recover iMessages from the iTunes backup, there are two ways for you to choose from: Selectively recover iMessages or recover the entire backup.
| Dr.Fone - iPhone Data Recovery | Restore via iTunes | |
|---|---|---|
| Devices Supported | For all iPhones, including iPhone 6s (Plus) | For all iPhones |
| Pros |
Preview iTunes backup content before recovery; |
Free; |
| Cons | Paid software with a trial version. |
No preview; |
| Download | Windows version, Mac version | iTunes |
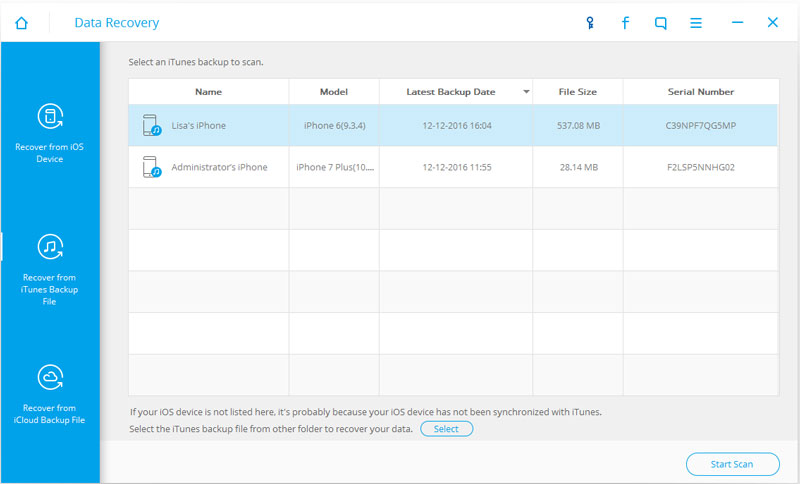
All backup files of your device type will be listed automatically after you enter this recovery mode (as the window shown above). Choose the one for your iPhone (usually the one with latest backup date if there are more than one), and click Start Scan to begin extracting it for your iMessage.
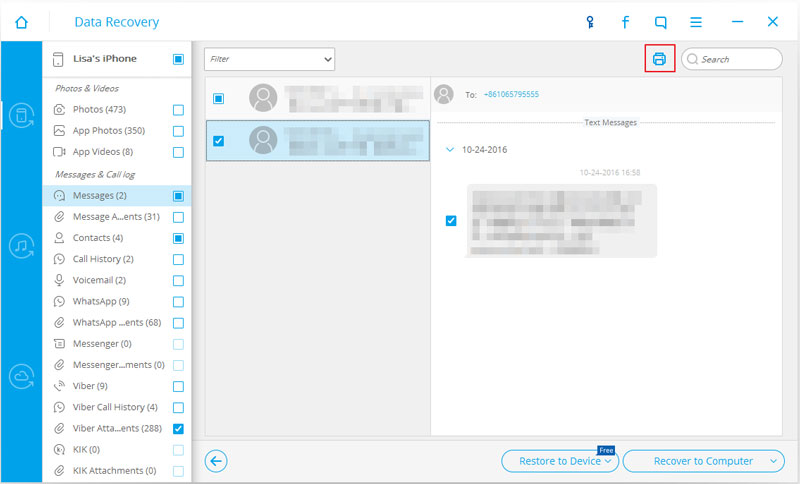
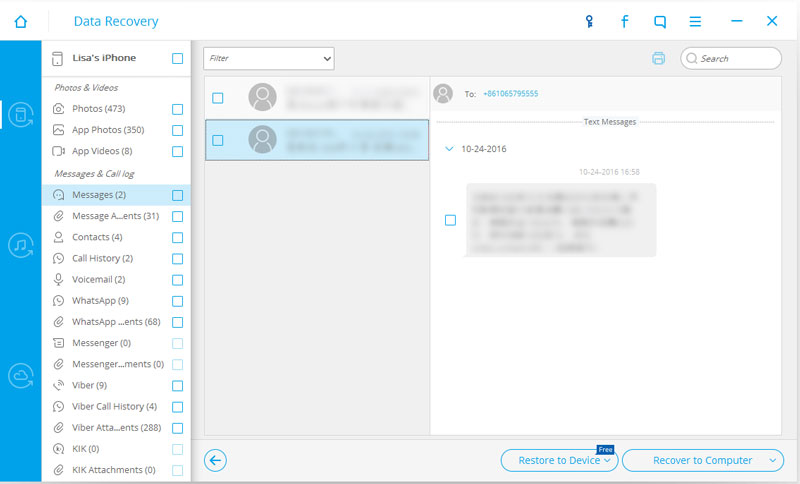
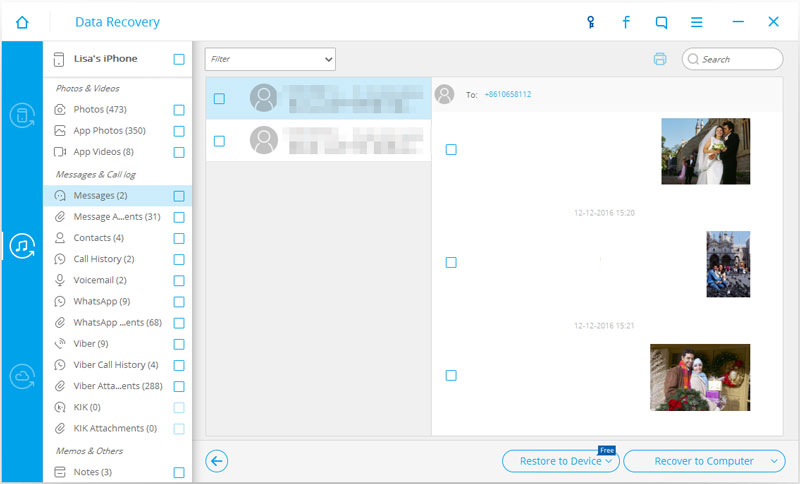
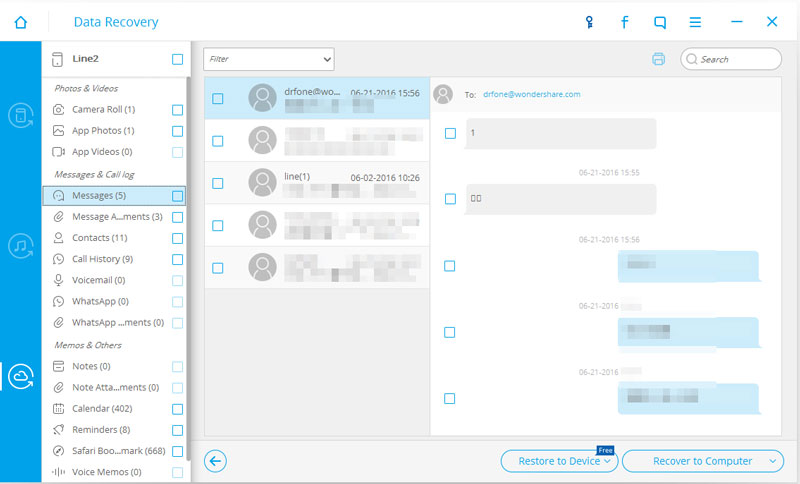
When the extracting completes, the whole content of the backup file are displayed in details. Select Messages on the left side on the window, and you can preview detailed contents of your messages and iMessage. Mark those you want to recover and click "Recover" button on the top of the window, you can save them on your computer with one simple click.
To restore iMessage from iCould backup, you need to restore the whole backup by setting your iPhone as a new device first. If you don't want to do it in this way, you can also use Dr.Fone - iPhone Data Recovery. It lets you access to preview and selectively recover iMessages on your iPhone.
Switch to the recovery mode of Recover from iCloud Backup File on the top of the program's window.
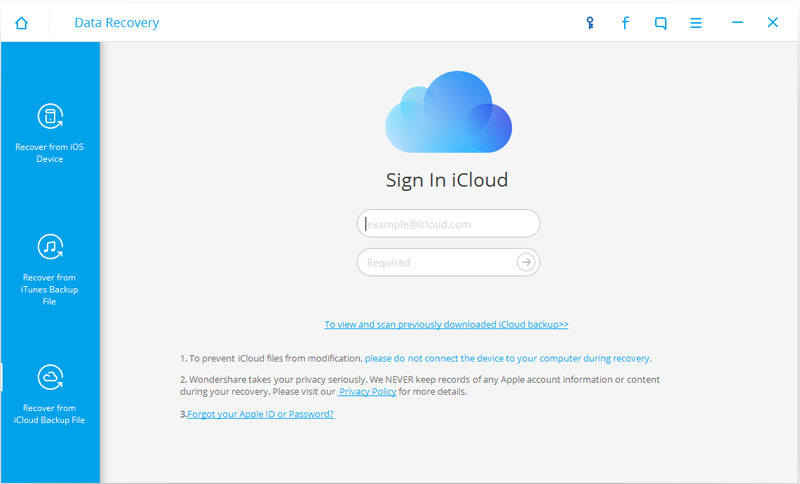
When running Dr.Fone - iPhone Data Recovery on your computer, go to the recovery mode of Recover from iCloud Backup File on the top of the window. Then the program will present you a window for logging in your Apple ID. Just do it as it tells you. Wondershare takes your privacy seriously and won't keep any record of it.
Once you logged in, the program will automatically find all your backup files in the iCloud account. Choose the one you want and click to download it. Then you can scan it with another one click.
Note: The downloaded file is only located on your computer. There is no record in the program or any other place.
Switch to the recovery mode of Recover from iCloud Backup File on the top of the program's window.
The scan will take you some time. When it stops, you can read all found data in your iCloud backup. Choose the item of Messages and Message Attachments. You can select any one you want and save it on your computer by clicking on the Recover button.
Fix with various iOS system issues like recovery mode, white Apple logo, black screen, looping on start, etc.
Backup and restore any item on/to a device, and export what you want from the backup to your computer.

Apr 29,2016 9:47 am / Posted by Selena Lee to iPhone Messages
Product-related questions? Speak directly to our Support Team >>